The Growing Market for Infrared Thermography Services
The global infrared thermography market demonstrates substantial growth trajectory, valued at $480.5 million in 2025 and projected to reach $820.8 million by 2035, representing a compound annual growth rate of 5.5%. Year-on-year growth remains steady, with the market reaching $534.8 million in 2027 and $628 million by 2030. Revenue generation is influenced by increasing adoption across industrial inspections, predictive maintenance, electrical monitoring, and building diagnostics applications.
The infrared thermography market holds notable proportions within parent markets, accounting for approximately 15 to 17 percent of the thermal imaging market, around 10 to 12 percent of the non-destructive testing market, close to 8 to 9 percent of the condition monitoring market, about 6 to 7 percent of the industrial inspection equipment market, and roughly 4 to 5 percent of the security and surveillance equipment market. The cumulative share across these parent segments ranges from 43 to 50 percent, reflecting strong presence of infrared thermography solutions across industrial, security, and inspection applications.
Applications in preventive maintenance are being prioritized as businesses seek reliable, non-contact methods for detecting anomalies and minimizing operational disruptions, contributing to consistent market expansion. Over the 2025 to 2035 period, market fluctuations are being moderated as supply chains, service providers, and end-user segments align to meet rising demand. Investment in product quality, precision, and imaging resolution is recognized as competitive advantage driving continued adoption.
Understanding Infrared Thermography Technology
Fundamental Principles
Infrared thermography represents a non-destructive and non-intrusive testing process employed as predictive maintenance inspection technique to detect abnormal heat patterns in machines using infrared cameras. Any object with temperature above −273.15 degrees Celsius, absolute zero or 0 kelvin, emits thermal infrared energy undetectable by human eye. Advanced thermal imaging techniques use thermal image scanners to detect and display these infrared wavelengths regardless of visible illumination.
A device known as thermal imager is used in this method to detect radiation emitted from objects, converting it to temperature and creating images of detected temperature distribution known as thermograms. The thermograms are utilized to analyze thermal anomalies in different types of equipment. Abnormal temperature patterns typically precede equipment failures, corroded electrical connections, damaged components, and other conditions requiring attention.
The process relies on fundamental physics of electromagnetic radiation. All objects emit infrared radiation proportional to their absolute temperatures. Hotter objects emit more infrared energy than cooler objects. Thermal imaging cameras contain detector arrays sensitive to infrared wavelengths. These detectors convert infrared radiation into electrical signals which processing circuits transform into visual images.
Color palettes or grayscale representations display temperature variations. Thermal images typically use false color where warmer areas appear as red, orange, or yellow while cooler regions display as blue, green, or purple. These color-coded representations enable rapid identification of temperature anomalies warranting investigation. The human brain processes visual information quickly, making thermal images intuitive diagnostic tools.
Equipment and Technology
Modern thermal imaging cameras range from handheld units to sophisticated systems with advanced features. Entry-level models provide basic temperature measurement and image capture suitable for routine inspections. Professional-grade cameras offer higher resolution, enhanced thermal sensitivity, and comprehensive analysis capabilities required for detailed diagnostics.
Resolution represents critical specification affecting image quality. Common thermal detector resolutions include 160 by 120, 320 by 240, and 640 by 480 pixels. Higher resolutions produce clearer images revealing finer details. Some cameras feature SuperResolution technology combining multiple images to create enhanced resolution outputs. For demanding applications requiring maximum detail, higher resolution justifies additional investment.
Thermal sensitivity determines smallest temperature differences cameras can detect. Professional cameras achieve sensitivities below 0.03 degrees Celsius enabling detection of subtle temperature variations. High sensitivity proves essential when identifying developing problems exhibiting minor temperature differences from normal conditions. Applications requiring precision benefit from enhanced thermal sensitivity specifications.
Temperature range capabilities determine maximum and minimum temperatures cameras can measure. Standard industrial cameras typically measure from negative 20 to positive 350 degrees Celsius. Specialized high-temperature models extend ranges to 1200 degrees Celsius for applications including furnaces, kilns, and metal processing. Selecting appropriate temperature range ensures accurate measurements across anticipated operating conditions.
Image Capture and Analysis
Proper thermography technique requires understanding emissivity, reflected temperature, distance, and atmospheric effects influencing measurements. Emissivity represents material property describing how efficiently surfaces emit infrared radiation compared to perfect blackbody radiators. Different materials exhibit different emissivities affecting temperature readings. Most thermal cameras enable emissivity adjustment ensuring accurate measurements across various materials.
Reflected temperature represents infrared radiation from surrounding objects reflecting off inspected surfaces. Shiny metallic surfaces particularly susceptible to reflection artifacts requiring careful technique. Inspectors position themselves avoiding angles where reflections interfere with measurements. Understanding reflection enables distinguishing actual temperature from reflected radiation.
Distance between camera and target affects measurement accuracy. Longer distances reduce spatial resolution and increase atmospheric absorption effects. Atmospheric moisture and carbon dioxide absorb some infrared radiation reducing accuracy at extended ranges. Following manufacturer specifications regarding measurement distances ensures reliable results.
Environmental conditions during inspections affect results. Wind, rain, and direct sunlight influence surface temperatures. Ideal inspection conditions minimize these variables. Indoor electrical inspections benefit from stable environments. Outdoor building envelope surveys require appropriate weather conditions. Planning inspections during favorable conditions improves result quality and reliability.
Electrical System Applications
Power Distribution Equipment
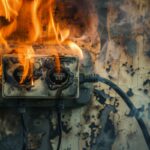
Electrical systems represent primary thermography application area. Loose connections, corrosions, and load imbalances resist electron flow causing connections or circuits to heat. This represents energy organizations pay for while getting no value. Early detection enables corrections before failures occur. Electrical thermal imaging helps identify loose connections, overloaded circuits, and faulty components throughout distribution systems.
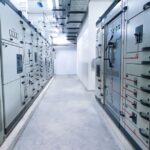
Main distribution boards and switchgear require regular thermographic inspection. These critical components control power distribution throughout facilities. Connection problems in main panels affect downstream equipment. Thermal surveys identify hot spots indicating loose terminations, overheated breakers, or phase imbalances. Addressing these issues prevents service interruptions and equipment damage.
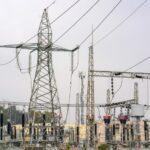
Transformers represent expensive critical equipment requiring monitoring. Internal hotspots indicate winding failures, core problems, or cooling system deficiencies. External thermal imaging detects fluid levels and radiator convection cooling problems. Oil-filled transformer inspections identify internal conditions through tank surface temperature patterns. Early problem detection enables preventive action before catastrophic failures.
Circuit breaker thermal patterns reveal connection quality and proper operation. Overheated breakers may indicate approaching failure or improper sizing. Thermal imaging identifies problematic breakers enabling replacement during planned maintenance rather than emergency outages. This proactive approach minimizes disruption while improving reliability.
Motor and Drive System Monitoring
Motors represent ubiquitous industrial equipment consuming substantial electrical energy. Thermal imaging detects bearing problems, winding failures, coupling misalignment, and lubrication deficiencies. Regular monitoring enables predictive maintenance scheduling based on actual equipment condition rather than arbitrary time intervals.
Bearing temperatures provide early warning of impending failures. Properly lubricated, correctly loaded bearings operate at consistent temperatures. Temperature increases indicate developing problems requiring investigation. Thermal imaging surveys monitor bearing conditions across multiple motors simultaneously. Trending temperatures over time reveals gradual degradation warranting intervention.
Motor winding hotspots indicate electrical problems including phase imbalances, voltage irregularities, or insulation breakdowns. These thermal anomalies warrant electrical testing determining root causes. Addressing winding problems prevents motor failures avoiding unplanned production interruptions. The cost of thermal surveys represents small fraction of motor failure expenses.
Variable frequency drives control motor speeds in many applications. These power electronic devices generate heat during normal operation. Excessive temperatures indicate inadequate cooling, overloading, or component degradation. Thermal imaging identifies problem VFDs before failures occur. The non-contact inspection method enables surveys without disrupting operations.
Cable and Termination Assessment
Underground cable faults present particular challenges for maintenance teams. Traditional fault location methods prove time-consuming and expensive. Thermal imaging surveys of accessible cable terminations identify problems before they progress. Hotspots at terminations often indicate deteriorating connections warranting investigation.
Cable tray installations require inspection for overloaded conductors. Multiple circuits sharing cable trays can create heat accumulation. Thermal surveys identify overheated cables requiring load redistribution or additional trays. This prevents cable damage and fire hazards. Regular monitoring ensures safe loading conditions.
Bus duct assemblies distribute high currents across facilities. Although reliable, these assemblies are difficult testing by conventional methods due to limited access. Thermal imaging surveys identify connection problems, phase imbalances, and cooling deficiencies through external temperature measurements. This non-contact inspection enables assessment without service interruption.
Outdoor switchgear integrity is often compromised by defective strip heaters. Strip heaters maintain enclosure temperatures slightly above ambient preventing condensation. Malfunctioning heaters allow moisture accumulation creating corrosion and electrical problems. Thermal imaging verifies strip heater operation identifying defective units requiring repair or replacement.
Mechanical System Inspections
Rotating Equipment Monitoring
Rotating equipment including pumps, compressors, and fans benefits from thermographic monitoring. Bearing problems represent common failure modes for rotating machinery. Temperature increases precede bearing failures by weeks or months. This advance warning enables planned maintenance avoiding catastrophic failures and associated production losses.
Coupling alignment affects bearing loads and temperatures. Misaligned couplings create uneven loading causing temperature variations across bearing assemblies. Thermal imaging identifies alignment problems requiring correction. Proper alignment extends bearing life while reducing energy consumption through decreased mechanical losses.
Gear reducer inspections reveal lubrication problems and tooth wear patterns. Inadequate lubrication causes elevated temperatures throughout gear cases. Localized hotspots indicate tooth contact problems requiring alignment checks or tooth replacement. Regular thermal surveys ensure optimal gear reducer operation.
Fan installations require monitoring for motor and bearing conditions. Fan motors often operate in harsh environments accelerating degradation. Bearings support substantial loads particularly in industrial ventilation applications. Thermal imaging identifies developing problems enabling maintenance during planned outages rather than emergency repairs.
Hydraulic and Pneumatic Systems
Hydraulic systems develop leaks, blockages, and component wear affecting temperatures. External thermal imaging reveals internal conditions through component surface temperatures. Restricted flow creates localized heating. Leaking valves exhibit characteristic thermal patterns. These non-invasive inspections guide maintenance decisions.
Hydraulic pump conditions manifest through temperature patterns. Cavitation, worn components, and improper adjustment cause elevated temperatures. Thermal monitoring identifies problematic pumps requiring service. Trending pump temperatures over time reveals gradual deterioration guiding replacement timing.
Pneumatic systems similarly benefit from thermal inspection. Compressed air leaks waste substantial energy while causing equipment problems. Thermal imaging reveals air leaks through characteristic cooling patterns. Large leaks create visible temperature reductions where high-velocity air escapes. Systematic leak detection enables significant energy savings.
Cylinder operation assessment through thermal imaging identifies internal seal problems and alignment issues. Properly functioning cylinders exhibit uniform thermal patterns. Hotspots or cold spots indicate problems warranting mechanical inspection. This guided troubleshooting reduces diagnostic time while improving repair quality.
Building Envelope and HVAC Diagnostics
Insulation Performance Assessment
Building envelope thermography identifies insulation deficiencies, air leakage, and moisture infiltration. These surveys support energy efficiency initiatives, comfort improvements, and building maintenance programs. Infrared thermography represents only proven non-destructive method for identifying moisture and energy loss in building assemblies.
Insulation missing or improperly installed creates characteristic thermal patterns. Interior surveys during cold weather reveal heat loss through walls, roofs, and floors. These cold spots indicate areas requiring insulation improvement. Exterior surveys following sunny days show retained heat revealing insulation effectiveness. Both approaches provide valuable information guiding remediation.
Air infiltration wastes energy while causing comfort problems. Thermal imaging reveals air leakage paths invisible through visual inspection alone. Gaps around penetrations, unsealed joints, and damaged weatherstripping appear as thermal anomalies. Systematic surveys document infiltration locations enabling targeted sealing efforts.
Moisture intrusion accelerates structural deterioration while supporting mold growth. Wet insulation loses effectiveness requiring drying or replacement. Thermal imaging detects moisture in building assemblies through evaporative cooling patterns. Problem areas appear cooler than surrounding dry regions. This early detection prevents extensive damage.
HVAC System Performance
HVAC equipment conditions affect energy consumption and comfort. Thermal imaging identifies problems including refrigerant leaks, blockages, and component failures. Regular surveys ensure systems operate efficiently while avoiding premature failures.
Air conditioning coil inspections reveal airflow problems, refrigerant distribution issues, and fouling conditions. Uniform temperature patterns across coils indicate proper operation. Temperature variations suggest problems requiring investigation. Thermal imaging guides maintenance decisions optimizing performance.
Heating system inspections identify burner problems, heat exchanger failures, and air distribution issues. Hotspots in furnace heat exchangers may indicate developing cracks. Duct system thermal patterns reveal insulation deficiencies and air leakage. These findings support system optimization and repair prioritization.
Underfloor heating and snow-melting system assessments verify proper operation. Thermal imaging provides quick verification of system functionality. Coverage patterns reveal whether heating coils operate uniformly. Problem areas receive targeted attention rather than wholesale system replacement.
Implementation Best Practices
Inspection Planning and Procedures
Successful thermography programs require proper planning, execution, and documentation. Defining inspection objectives guides survey approaches. Power distribution surveys differ from building envelope assessments. Understanding objectives ensures appropriate techniques and deliverables.
Equipment preparation affects result quality. Electrical systems should operate under normal or near-normal loads during surveys. Minimal load conditions may not reveal problems. Coordinating surveys with operations ensures representative conditions. Building surveys require temperature differentials between inside and outside. Planning timing around weather conditions improves effectiveness.
Safety considerations guide inspection approaches. Electrical work requires appropriate personal protective equipment and arc flash protection. Thermal imaging enables non-contact inspection maintaining safe distances from energized equipment. However, panel doors must be opened exposing inspectors to hazards. Following safety protocols protects personnel while enabling thorough inspections.
Documentation standards ensure consistent results. Each thermal image should include reference photos, temperature scales, and measurement data. Written reports describe findings, assess severity, and recommend corrective actions. Consistent documentation enables tracking conditions over time revealing trends guiding maintenance decisions.
Frequency and Scheduling
NFPA 70B provides guidance on electrical equipment inspection intervals. The 2023 update recommends all electrical equipment receive inspection at least every 12 months. Equipment under continuous monitoring or those missing two maintenance cycles require semi-annual inspections. These guidelines establish baseline frequencies though specific circumstances may warrant more frequent surveys.
Critical equipment justifies more frequent inspection. Facilities depending on specific equipment for production or safety should monitor conditions closely. Monthly or quarterly surveys provide early warning of developing problems. The modest survey cost represents insurance against catastrophic failures and production losses.
Environmental factors affect appropriate inspection intervals. High heat, dust, vibration, and moisture accelerate equipment degradation. Facilities operating in harsh conditions benefit from frequent monitoring. Conversely, equipment in controlled environments may operate longer between surveys. Adjusting frequencies based on conditions optimizes resource allocation.
Seasonal considerations influence inspection timing. Building envelope surveys require appropriate temperature differentials. HVAC surveys coincide with system operation. Outdoor electrical equipment assessments avoid extreme weather. Planning surveys around these factors improves result quality and usefulness.
Personnel Qualifications and Training
Thermography requires specialized knowledge and skills. Camera operation represents only portion of necessary competencies. Understanding heat transfer, electrical systems, mechanical equipment, and building science enables proper interpretation of thermal images. Quality training programs address these diverse topics.
Certification programs validate thermographer capabilities. The Infrared Training Center offers multiple certification levels. Level I certification demonstrates basic competency. Level II certification indicates advanced knowledge and experience. Organizations should verify thermographer qualifications ensuring competent service.
Ongoing education maintains current knowledge. Technology evolves continuously with new camera capabilities and analysis software. Industry standards and best practices similarly advance. Thermographers attending regular training stay current with developments. This commitment to learning ensures service quality.
Practical experience complements formal training. Interpreting thermal images requires understanding normal versus abnormal patterns. This knowledge develops through exposure to diverse equipment and conditions. Experienced thermographers recognize subtle anomalies escaping novice notice. Organizations benefit from engaging qualified, experienced professionals.
Reporting and Follow-Up
Report Content and Format
Comprehensive thermography reports document findings and guide actions. Reports typically include executive summaries, detailed findings, thermal and reference images, and recommendations. Clear organization enables recipients quickly understanding key issues while accessing detailed information as needed.
Severity classifications prioritize findings. Critical issues require immediate action. High-priority items warrant attention within weeks. Medium and low-priority findings support planned maintenance scheduling. This classification guides resource allocation toward most serious problems.
Temperature measurements provide quantitative data supporting assessments. Recording actual temperatures and temperature rises above ambient enables objective comparison. Standards organizations provide guidelines relating temperature rises to problem severity. Following these guidelines ensures consistent, defensible recommendations.
Trend analysis benefits from consistent measurement locations. Documenting specific measurement points enables meaningful comparison over time. Software tools assist tracking condition changes revealing degradation patterns. This trending capability represents significant thermography program value.
Corrective Action Implementation
Thermography findings require follow-up ensuring problems receive attention. Organizations should establish procedures assigning responsibility for corrective actions. Clear accountability prevents issues languishing unaddressed. Regular review meetings track progress toward resolution.
Prioritization guides action sequencing. Critical findings warrant immediate response potentially including temporary measures pending permanent repairs. Less severe issues integrate into planned maintenance schedules. This prioritization balances urgency against resource constraints and operational requirements.
Verification surveys following repairs confirm effectiveness. Thermal imaging after correction documents improvement validating work quality. Continued problems indicate incomplete repairs requiring additional attention. This verification step ensures resources invested in corrections achieve intended results.
Documentation maintains program value. Recording findings, actions taken, and results creates institutional knowledge. Future surveys reference historical data revealing trends. This comprehensive documentation demonstrates program effectiveness supporting continued investment.
Return on Investment and Cost Justification
Quantifying Benefits
Thermography program benefits include avoided failures, reduced energy costs, and improved reliability. Quantifying these benefits justifies program costs while demonstrating value to stakeholders. Organizations should track savings systematically documenting thermography contributions.
Avoided failure costs represent primary savings category. Single major failure often exceeds multiple years of survey costs. Production losses, emergency repair expenses, and secondary damage create substantial financial impacts. Preventing even occasional failures through early detection yields significant returns.
Energy savings from correcting electrical problems accumulate continuously. Resistive losses from loose connections waste energy constantly. Repair costs prove modest compared to ongoing waste. Organizations should calculate energy costs of identified problems comparing against repair expenses demonstrating positive returns.
Equipment life extension provides additional value. Addressing developing problems prevents cascading failures. Equipment operating longer between replacements requires lower capital investment. This extended service life represents substantial but often overlooked benefit.
Cost Comparison with Alternatives
Thermography compares favorably with alternative inspection approaches. Traditional inspection methods require equipment shutdown or de-energization. These outages create production losses and scheduling complexities. Thermal imaging enables inspections during normal operation eliminating these costs.
Contact temperature measurement methods prove time-consuming and incomplete. Manually checking connections requires physical contact with each termination. Large facilities have thousands of connection points. Complete manual inspection proves impractical. Thermal imaging surveys efficiently assess all equipment revealing problems warranting detailed investigation.
Periodic replacement strategies waste resources replacing functional equipment. Without condition monitoring, organizations must replace equipment based on age. However, equipment degradation varies widely based on loading, environment, and maintenance. Thermography enables condition-based replacement optimizing capital allocation.
Regional Considerations for Middle East Operations
Environmental Challenges
Middle East environments present unique thermography challenges. Extreme heat affects equipment operation and inspection conditions. Ambient temperatures regularly exceeding 40 degrees Celsius reduce temperature differentials between normal and abnormal equipment operation. This compressed range complicates problem identification.
Dust and sand accumulation affects surface emissivity. Thermal cameras measure surface temperatures which may differ from underlying component temperatures when dust layers provide insulation. Inspectors must account for contamination effects when interpreting results. Cleaning equipment before surveys improves accuracy.
Solar radiation creates thermal gradients in outdoor equipment. Direct sunlight heats surfaces beyond normal operating temperatures. These solar effects can mask electrical problems or create false indications. Scheduling outdoor inspections during evening hours after solar heating dissipates improves result quality. Alternatively, adjusting interpretation techniques accounts for solar influences.
High humidity levels affect atmospheric transmission of infrared radiation. Moisture absorbs certain infrared wavelengths reducing measurement accuracy at longer distances. While typically not severe issue for typical inspection distances, awareness of atmospheric effects ensures appropriate technique.
Compliance and Standards
UAE facilities must comply with local electrical codes and safety standards. Dubai Electricity and Water Authority, Abu Dhabi Distribution Company, Sharjah Electricity and Water Authority, and other utilities establish requirements. Many adopt international standards including NFPA 70B, IEEE, and IEC guidelines. Thermography programs should align with applicable requirements demonstrating compliance.
Insurance providers often require or incentivize thermography inspections. Comprehensive inspection programs may qualify for premium reductions. Documentation demonstrating systematic condition monitoring supports risk management objectives. Organizations should verify insurer requirements ensuring programs meet expectations.
Industry-specific regulations may mandate inspections. Oil and gas facilities, chemical plants, and other hazardous operations face stringent safety requirements. Thermography contributes to compliance demonstrating proactive equipment monitoring. Inspection records support regulatory reporting and audit processes.
Conclusion
Infrared thermography represents powerful predictive maintenance technology enabling early problem detection across diverse applications. The global market growing from $480.5 million in 2025 to projected $820.8 million by 2035 at 5.5 percent compound annual growth rate reflects increasing recognition of technology value. Applications spanning electrical systems, mechanical equipment, and building diagnostics demonstrate broad applicability.
The fundamental principle of detecting temperature anomalies indicating developing problems enables non-contact, non-invasive inspections during normal operations. This capability provides substantial advantages over traditional inspection approaches requiring equipment shutdown or physical contact with components. Thermal imaging efficiently surveys large installations identifying problems warranting detailed investigation.
Electrical system applications represent primary thermography use case. Power distribution equipment, motors, cables, and terminations all benefit from regular thermal surveys. Loose connections, overloaded circuits, and component degradation manifest as elevated temperatures. Early detection enables correction during planned maintenance preventing failures and associated costs.
Mechanical system inspections reveal bearing problems, alignment issues, and lubrication deficiencies. Rotating equipment monitoring provides advance warning of impending failures enabling predictive maintenance. This condition-based approach optimizes maintenance timing based on actual equipment state rather than arbitrary schedules.
Building envelope and HVAC diagnostics support energy efficiency and comfort objectives. Insulation performance, air leakage, and moisture problems appear through characteristic thermal patterns. HVAC equipment surveys ensure efficient operation while identifying developing problems. These applications contribute to sustainability goals while reducing operating costs.
Implementation best practices guide effective programs. Proper planning, appropriate equipment, qualified personnel, and systematic documentation ensure quality results. NFPA 70B recommending annual electrical equipment inspections establishes baseline frequency. Critical equipment and harsh environments warrant more frequent surveys. Scheduling considers operational requirements and environmental conditions maximizing result quality.
Report content and follow-up procedures translate survey findings into corrective actions. Severity classifications prioritize issues guiding resource allocation. Verification surveys confirm repair effectiveness. Systematic documentation maintains program value while demonstrating benefits to stakeholders.
Return on investment calculations quantify thermography program value. Avoided failure costs, energy savings, and equipment life extension provide measurable benefits typically exceeding program costs substantially. Single prevented major failure often justifies multiple years of survey expenses. Systematic tracking of benefits demonstrates ongoing program value.
Middle East environmental conditions create unique challenges requiring adapted approaches. Extreme heat, dust accumulation, and solar radiation affect inspection techniques and result interpretation. However, these challenging conditions also accelerate equipment degradation making thermography even more valuable for facility operators.
As equipment complexity and operational demands increase, systematic condition monitoring becomes increasingly critical. Thermography provides cost-effective means of assessing equipment health guiding maintenance decisions. Organizations implementing comprehensive thermography programs realize substantial benefits through improved reliability, reduced costs, and enhanced safety. The technology represents mature, proven approach deserving consideration in any comprehensive maintenance strategy.


